
Your LinkedIn profile photo is an integral part of your personal branding declaration. It’s critical that you obtain it right, as well as yet many individuals get it incorrect. The highest-level exec submits a picture of himself wearing a Hawaiian shirt. A clever business owner makes use of a photo from her close friend’s wedding and crops out three-quarters of her day’s face. The specialist who can manage intricate tasks selects an image of himself holding the family members’ animal.
Your LinkedIn profile picture ought to showcase you as a professional who regulates regard. This chapter walks you with the actions of discovering simply the ideal profile image that provides you in the most professional light and raises your professional brand name. You find out why you need an excellent photo, exactly how to take your own image, just how to deal with a digital photographer if you obtain an expert image taken, as well as exactly how to upload your image to LinkedIn.
Why You Need a Profile Picture
Your LinkedIn profile picture can either help or hinder your success on LinkedIn. According to LinkedIn’s official blog site (https://blog.linkedin.com), accounts with profile pictures obtain 11 times a lot more views than profiles without a picture. You are additionally 14 times most likely to be checked out on LinkedIn if you have a profile photo.
The inclusion of an expert profile picture reveals that you are a significant LinkedIn user and networker. It’s difficult to rely on the credibility of a profile without a picture.
Envision you are shopping online as well, as the thing you desire to purchase is available, but a photo hasn’t been consistent in the listing. Would certainly you buy it? Not usually! It’s tough to trust a sales listing without an image. The very same point goes with a profile without a profile picture. A professional photo reveals to your visitor that there is a genuine individual behind the profile, as well as that you get on LinkedIn for business objectives.
Profile photos are not simply delegated to your profile. When your profile appears on the search results page, your photo shows up next to your name as well as subliminally begs your visitor to “Read everything about me!” Profile images additionally appear in addition to your LinkedIn Group messages, Network Updates, recommendations, as well as a lot more.
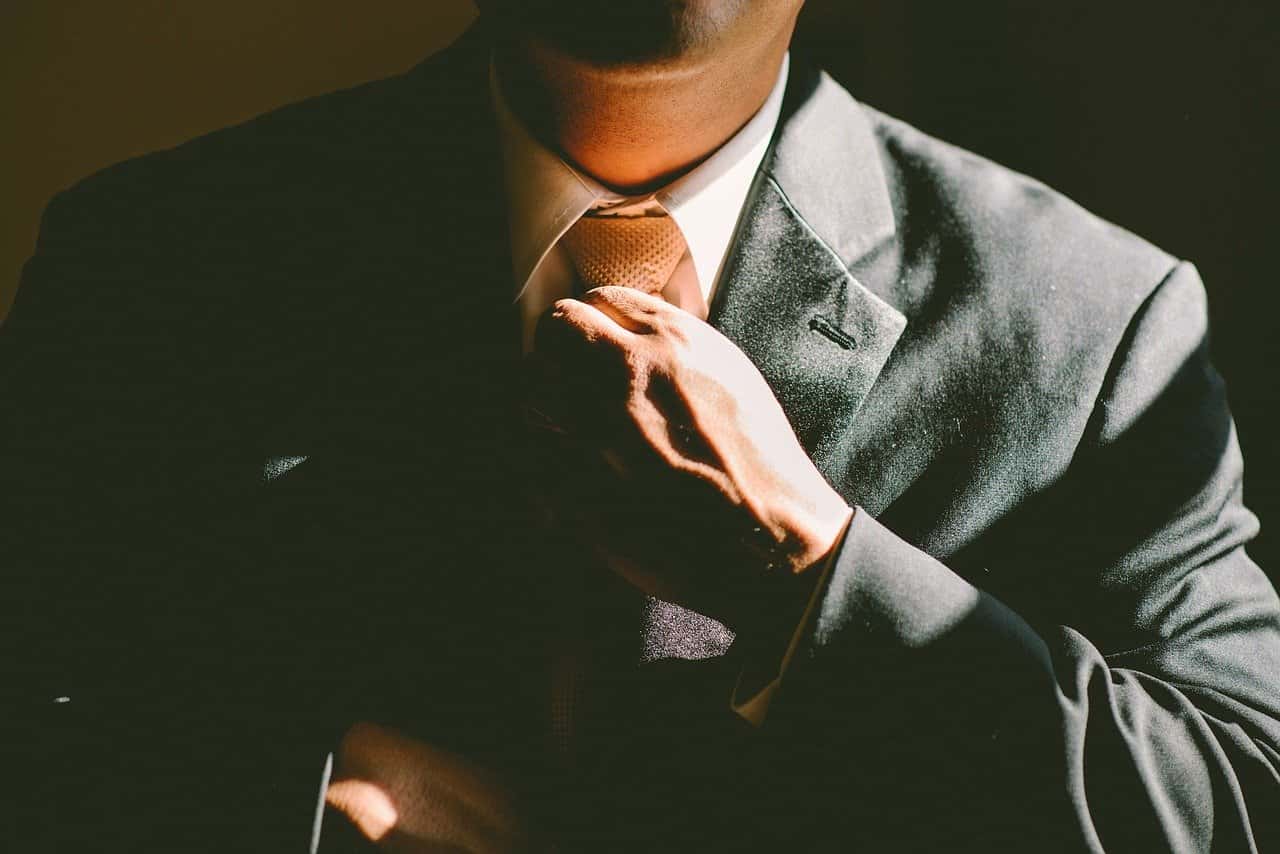
Since your profile is used in many areas, it really is your electronic stand-in. Your profile picture is your visual impact on your network. It’s important to look good; you don’t need to look like a supermodel. Your image ought to capture the picture of a professional that looks pleasant, clean, as well as well-adjusted.
Determining If You Need a Brand New Profile Picture
Uncertain if you are utilizing the very best profile image? It is hard to see on your own as others see you. I’ve produced a list of concerns to help you determine whether it’s time for you to replace your profile photo.
THE DO’S AND DON’TS OF PROFILE PICTURES
Do’s.
- Have a properly taken image.
- Look straight into the video camera.
- Use a plain, indistinct history.
- Dress skillfully.
- Zoom in close, frame your face!
Don’ts.
- Use a picture taken at a wedding event.
- Wear sunglasses or avert from the electronic camera.
- Have a distracting, hectic history.
- Wear a showering fit.
- Use a full-length shot or have others in the frame with you.
Open your LinkedIn profile as well as attempt to look at your profile picture objectively.
Answer each question with either Yes or No:
- Is your profile image over three years of age?
- Was your profile image broke at a family member’s event, such as a wedding?
- Does your profile image consist of an additional person along with yourself?
- Are there remnants of another person chopped out of your profile photo?
- Are there pets in your profile picture?
- Are you wearing a hat or sunglasses in your profile picture?
- Is your profile image of an anime character, business logo, symbol, or creative depiction?
- Can you conveniently determine the history of your profile image?
- Are you looking up or down or anywhere apart from the straight right into the video camera’s lens?
- Is the quality of the photo rough or dark?
- Do you look major (not grinning)?
- Are you wearing a T-shirt, showering fit, or jeans in your profile picture?
- Are your elbows or knees visible in your profile picture?
- Did you have somebody apart from a professional photographer take your profile picture?
If you answered “yes” to any of the inquiries, it’s time to obtain a new profile photo. Even if you answered “no” to all of the questions, there is a great chance you still require a brand-new profile photo. You may enjoy your present image, but does it genuinely cast you in the best light? If you aren’t sure, maintain reading!
A powerful LinkedIn profile picture is cropped, centered, and later taken. The image is not also dark, grainy, or drawn from afar. Most importantly, you emphasize the photograph, and the picture highlights you as a specialist!
Using a Photo Already Taken.
There are rare celebrations when people have a picture currently taken that works well as a profile photo. Generally, they have already gone to a digital photographer and also had a business headshot taken. Often, individuals have a broken picture at an event or while they got on stage, providing a discussion. Perhaps you have an image from your site’s About web page that becomes part of your brand, as well as you utilize it across all your social network accounts.
At one time, the rule of thumb was to use the exact same photo across every one of the social media sites websites– Facebook, Twitter, Instagram, and so forth. Now, having that a regular person photo isn’t required. Each social network site has a different point of view and the target market. If you utilize Facebook for family members and stay much more individual, utilize a personal, casual photo for your profile photo. It doesn’t need to be the very same one you use on LinkedIn.
As long as the photo you intend to use is professional-looking as well as casts you in the ideal light, go on as well as upload it. If you are doing this because you are cheap or so busy, you don’t have time to get a new, better picture taken, stop and keep reading. Your profile picture is an investment in your brand name as well as your future self. A number of my customers fight me over obtaining a profile image; once they have an excellent one taken, they are astonished at the results as well as exactly how often they are able to use it also beyond LinkedIn.
Working with a Photographer.
A specialist photographer has the ideal equipment and an experienced eye as well as knows just how to capture everyone in the most effective feasible light. And also, the genuine key is that a lot of specialist digital photographers are fairly cost-effective! Keep in mind, this is an investment into your future, and it’s worth spending money to make yourself look your finest.
I know it’s difficult for active experts to find the moment to set up a session with a digital photographer. As appealing as it may be to ask the professional photographer to come to your office, resist that desire. Go to the photographer’s workshop, where she has specialist lighting as well as appealing histories.
The best digital photographer is most likely simply down the street from you. All you need to do is an Internet search for digital photographers in your city or town. When you have a listing of prospective professional photographers, it is vital you take a look at their websites and also look at examples of their work. As you read there on the internet profiles, believe in regards to completion results. Are you impressed with their work? Do they have examples of business headshots they’ve already taken? The photographer might do outstanding work with brides as well as children, yet that doesn’t indicate he can do a professional headshot well.
I have a variety of customers who picked to head to an outlet store or a big-box store with a picture workshop for their headshots. In nearly every situation, the high quality of the resulting headshot is embarrassingly negative. The reason for this is that although the photographer at these locations is making use of specialist devices, often, the individual taking the headshot is not a trained, expert photographer.
A lot of surprises, when all is said and also done, these sessions set you back about the exact same as an independent photographer. My suggestion is to make use of a specialist photographer and remain away from the shopping center.
PROFESSIONAL PHOTOGRAPHER RATES.
Digital photography prices vary by area. A digital photographer in New York City is going to cost even more than a similar professional photographer in Tupelo, Mississippi. Photography is an imaginative solution, and a lot of professional photographers set their rates by their online reputations. The far better the digital photographer, the higher the cost of his/her session.
Expect to pay someplace in the ballpark of $100 to $500 a session. You might then need to pay extra for the actual retouched picture or any type of extra shots. In some instances, expect to pay even more than that. I as soon as I talked to a photographer that billed more than $1,000 for a session. She may have changed a great deal, yet she guaranteed you would certainly get an incredible picture that communicates your expert brand name and also really thrills.
You might find that you have the ability to obtain a photographer at a much lower expense. In this situation, do make certain you get examples of his/her work prior to scheduling. Remember the saying: You obtain what you spend for.
Taking Your Own Profile Picture.
Specialist digital photographers are actually not that pricey. The financial investment deserves it. Obviously, I can claim this up until I am blue in the face, and also, people still just wish to do it themselves. If I have not yet convinced you to work with a specialist digital photographer to take your headshot, right here’s how to take a professional-looking profile image on your own.
My motto when it comes to your profile picture is: Just say no to the selfie. When taking an image on your own, it’s hard to get the adequate distance between you and also the cam; arms are just so long. When taking selfies, individuals typically consider their pictures on the cam screen instead of at the camera lens; hence the resulting image looks a little off. And also, it takes a lot of pictures to get the appropriate one. If your arm doesn’t provide up from holding the electronic camera for so long, you might obtain exhausted running back and also forth from the tripod holding your video camera.
The service is to get a friend to take the photo for you. By doing this, you can focus on posing and smiling and leaving the actual photography to another person. The much less tension you are under, the much better you look.
Specialist professional photographers have specialist tools. Often you are fortunate to have an electronic single-lens response (DSLR) camera or understand a pal with one. Because scenario, consider your own luck. When you do not have access to great camera devices, use what you own. A good point-and-click electronic camera and even your smartphone functions. When dealing with amateur devices, offset it with excellent lighting, which I go over following.
Understanding the significance of light.
Good lighting makes all the distinction between an excellent image and also a horrible one. When having your picture taken by a professional, studio lighting can work marvels. When you have a friend taking your photo, as well as professional lighting isn’t offered, locate an area with lots of natural light. Prevent using the electronic camera’s flash or direct sunshine, as both cause harsh darkness.
Good professional photographers ensure to capture a representation in your eyes from the lights. It’s called “catch light.” Without that representation, the eyes look dull. When taking the photo on your own, attempt to create your very own catch light by activating a close-by lamp. If you do not have a brilliant enough lamp, include the representation afterward in a photo editor.
Finding the ideal background.
Distracting backgrounds can quickly derail a fantastic picture. When selecting the background, keep in mind that you are the focus of the picture. The history should be as plain and indistinct as feasible. When you are taking the photo on your own or with a close friend, search for a simple wall to work as the background. If you are a serious decorator and can not discover a wall that isn’t full of images, take into consideration taking the frames down momentarily. You can always make use of a photo editor if picture hooks show up in the last image.
When working with a professional digital photographer in her workshop, there must be several backgrounds offered. Prevent backgrounds that are busy or overly vibrant. Bamboo trees, laser light shows, as well as clouds are all backgrounds to pass on. A plain, white history commonly looks fantastic; however, I’ve also seen black backgrounds look beautiful. Use your ideal judgment when choosing. Think about the color of your clothing. If you are putting on a white, white background looks weird. Do not hesitate to ask digital photographers their specialist opinions. They do this for a living and are able to lead you.
Framing the shot.
There are many considerations to make when framing your shot. The video camera ought to be around your eye level. You do not want shots taken at as well low of an angle or too expensive of an angle. Too low of an angle makes you show up looming, as well high of an angle makes you look diminutive and subservient.
Don’t also focus close right now. Keep the area around your head, so you have a lot more cropping alternatives later on. The last photo on LinkedIn is an ideal square, not a long rectangular shape. Zooming in also close or shooting with a long rectangular shape in mind might generate a photo that can not be cropped later on for LinkedIn’s measurements.
You will certainly not get your ideal picture in one click. It might take thousands of shots before you obtain the very best image. Over and over again, my customers come back as well as inform me that the winning picture was taken at the very end of the session. It’s not a coincidence. Right around the moment, you begin to feel comfortable before the electronic camera is when the most effective photo is broken. Be patient, and stay calm.
As the electronic camera clicks, relocate around a bit. Keep your shoulders angled, not settled, with the electronic camera. Jutting your jaw out may really feel weird; however, it tightens your jawline and also stops that pesky double chin. Differ your expression but constantly take a look at the video camera. Assume in your mind: satisfied, pleasant, certain, calm.
Please smile. The objective is to look expert, not major. Striving to look severe by not grinning just makes you look upset as well as unapproachable. When you grin, let your eyes crinkle. A genuine smile engages the entire face. Afraid your crow’s feet will reveal? That’s what you are going for! A smile without eye creases isn’t genuine.
As soon as you have actually functioned your internal supermodel for about 5 to 10 minutes, ask the digital photographer to assess the shots taken thus much. By inspecting the pictures midsession, you can see if what you are doing is functioning and what modifications you might desire to make.
Finding the appropriate attire.
The outfit you put on in your headshot can make or damage your last profile image. The good news is, a headshot is generally just your head, so what you wear on an all-time low isn’t as essential as what you wear on the top. Make certain whatever you choose fits well in the shoulders and neck because that displays in the photo. When choosing what to put on, take into consideration an outfit you may use to a customer meeting or a job interview. If you work at an office that operates laid-back, pick a casual outfit.
When I was beginning in my occupation, my mommy informed me, “Don’t dress for the job you have, Donna, outfit for the job you desire!” So although your workplace atmosphere is a laid-back one, you still might decide to choose a much more formal business outfit in your profile image. This is especially real if you have greater desires for your job.
My suggestion is to bring two or three different attires with you to your session. Commonly what looks great in person doesn’t equate well to a photograph. By bringing a pair of different outfits, you can recover a studio session failed by the incorrect wardrobe selection.
When choosing your outfits, go with soft, neutral shades or stick to grey, navy, or black. If you like strong colors, go all out! Simply maintain it to one strong color instead of a significant scheme of bold shades. Avoid the shaken up t-shirts or crazy prints—select ties with either a strong color or basic pattern.
Below’s a suggestion for males: wear a fit for the photography session. Take the first pictures wearing the full fit. Eventually, remove the tie, but maintain the suit coat on. For the final time remaining, remove your jacket and open the top button of your white shirt. By doing this, you get three various looks with one clothing: official, semi-dressy, as well as casual.
Individuals commonly think they need to remove their spectacles when getting their images taken. I believe your glasses are a part of your brand name. Individuals are accustomed to seeing you in your glasses, as well as you ought to look familiar in your headshot.
Countless researches have revealed that glasses give the perception of knowledge and also professionalism and reliability. You may not get a day as Dorothy Parker claimed, but at least you will certainly get hired.
However, there can be an issue with a glow. When you wear glasses in a studio, a lot of times, the lights’ glare reviews the lenses. If you find this is the instance, right here is a service: eliminate the lenses. Place the lens-free glasses back on your face as well as a smile for the cam.
Choosing and also Uploading Your Profile Picture.
It’s tough to see yourself objectively. When it comes time to choose the best photo for your profile image, it’s usually best to request assistance. Pals and household or also associates usually notice points you miss concerning on your own, and they can provide you insight regarding exactly how you show up to others.
Photographers frequently supply you with a website that holds all the shots from your session. Share this weblink with a close friend as well as request for his or her support.
Don’t just ask any close friend. Make certain you pick a pal who is business-minded and also not scared to speak the reality. A few times, I had to extremely carefully inform a client that the photos taken were not of the very best quality, and they required to be taken back. This is never ever a comfy scenario, but it’s much better to hear the reality than to upload a ridiculous-looking profile photo that has individuals questioning if you are possibly insane or a specialist clown.
However, the final picture needs to not show an attractive cover girl instead of a friendly, satisfied, friendly, well-adjusted professional. Notice how I did not utilize descriptors like “severe” or “business.” When pursuing a major or corporate, individuals finish up looking ugly and also often even totally upset. Opportunities are not given to sourpusses who look sullen and also indifferent. The last image you select should illustrate a person that is likable, satisfied, and expert.
Cropping to profile image measurements.
When you have picked your final photo, it’s time to crop it to the ideal dimensions for LinkedIn. When dealing with a professional photographer, it’s an excellent idea to request high-resolution and also low-resolution styles. The high-resolution image is for printing. The low-resolution version is for submitting to LinkedIn.
The excellent photo size for LinkedIn is 400 x 400 pixels. Pictures over 20,000 pixels in either width or height will not upload. The optimum file dimension is 10MB. Plant to optimize your face in the frame. The goal for the top of your head down to just above your collarbone, with only a bit of shoulder proving. By zooming in, you get closer to the customer of your profile. Subliminally you are attracting them closer to you, showing you have absolutely nothing to hide.
Another factor to zoom is that the profile picture also gets smaller when viewing on the LinkedIn phone app. By optimizing your face, you are making it easier for people to see and recognize you on the smaller device.
LinkedIn accepts three file formats: JPG, GIF, or PNG. Which one is best? Go with.
Either JPG or PNG. GIF allows for only a limited palette of colors, and you may find your picture looks odd when saved as a GIF.
Resizing and saving a high-res image.
Is your final image too big? Whether the image straight out of your camera is too big, or the photographer is unable to provide you the image within the proper dimensions, all is not lost. You can always open the file in Microsoft Paint or another image editor and resize the shot yourself.
Follow these steps to resize a high-resolution image in Microsoft Paint:
- Open Microsoft Paint.
- Select file > Open and select the image you wish to resize.
- Click the Resize button that appears in the Toolbar. The Resize and Skew dialog box appear.
- Replace the horizontal and vertical dimensions with smaller dimensions closer to 400 x 400. Do not skew the image! You must maintain its dimensions. Otherwise, the image may elongate or widen.
- Click OK to close the Resize and Skew dialog box.
- Select File ➪ Save As and save the image as a JPG or PNG file.
The proverbial “airbrush” is a wonderful thing. If used properly, retouching can make a good photo even better. However, if used improperly, retouching is detrimental. Retouching is best done minimally. Use it to hide dark circles, but don’t zap away all of your crow’s feet. Use it to hide a zit, but not to reduce the size of your nose. The final image needs to be of you. You don’t want to upload an image of a stranger.
Uploading your photo.
Now that you have your business headshot ready to go, here’s how to upload it to.
LinkedIn:.
- Open your LinkedIn profile.
- Hover your mouse pointer over the profile picture area and click Change Photo or Add a Photo if you don’t currently have a profile picture uploaded. The Edit Photo dialog box appears.
- In the Edit Photo dialog box, click the Change Photo link that appears above the silhouetted picture LinkedIn uses as a space holder or your current profile picture. (If you don’t currently have a profile picture uploaded, click the Browse button.).
A window opens that enables you to select your photo from your hard drive. - Find your photo and click the Open button. A preview of the selected photo appears in the Edit Photo dialog box. Crop your photo by selecting the yellow square on the lower-right corner on top of your picture and resizing the square so that it fits your face, neck, and the top of your shoulders. LinkedIn crops your photo along that yellow dotted line.
- When you are happy with your photo, click Save. Your picture now appears on your profile page.
LinkedIn strictly forbids uploading a profile picture that is not a photograph of yourself. The idea behind the profile picture is that it is there to help people recognize you. In Section 8.2 of LinkedIn’s User Agreement (www.linkedin.com/legal/user-agreement), it states, “You agree that you will not: Use an image that is not your likeness or a headshot photo for your profile.” Therefore, do not upload photos of company logos, caricatures, cartoon characters, landscapes, animals, illustrations, words, or phrases.
Changing picture visibility settings
Some individuals are merely uneasy having their images appear in an online, public online forum. When clients of mine challenge posting their profile photos, usually they are comfortable with their network seeing their images but not the entire globe. Although I highly recommend making your profile visible to all, LinkedIn allows you some control over that sees your picture. You can’t alter exposure setups on a person by individual basis, but you can select in between your first-degree connections, your LinkedIn network, or everyone. Here’s just how:
- Open your LinkedIn profile.
- Float your mouse guideline over your profile picture and click Change Photo.
- Click the lock symbol that appears listed below your profile image.
- Select between My Connections, My Network, or Everyone. My referral is to keep it at Everyone, but if you just want individuals, you are straight linked to seeing your picture and selecting My Connections. If you would certainly favor just individuals within your LinkedIn network, choose My Network.


